Trigger Notification Email for New Leads
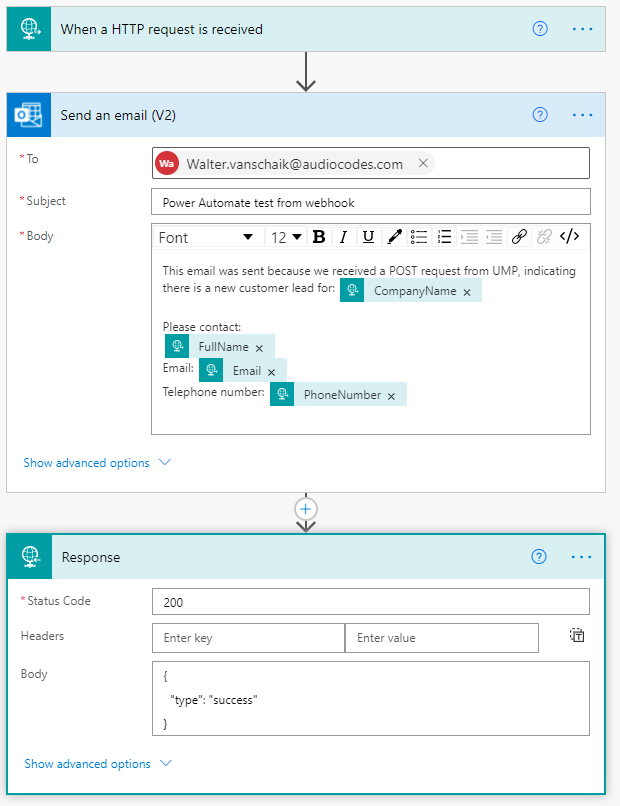
The Synchronizing with Power Automate feature enables you to trigger POST requests to perform actions on a customer CRM. For example, the action shown below triggers a webhook POST call to send an email to the customer’s CRM including fields from the JSON body, each time a new customer lead is generated.
| ● | A Power Automate Premium license is required to activate this feature. |
| ● | This action is relevant for Consented leads created as a result of customer providing consent in their Teams admin center (see Triggering the Partnering process from Teams admin center). |

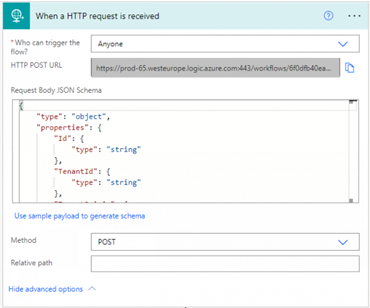
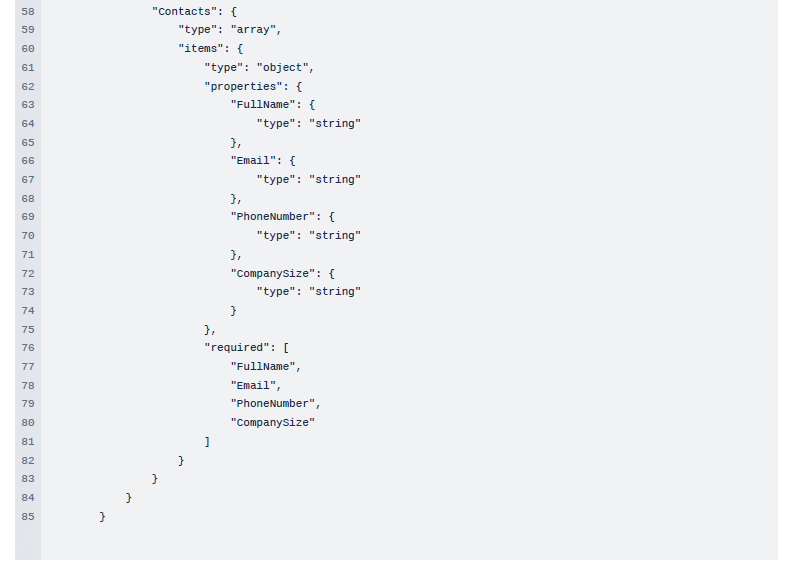
The Request Body JSON Schema used is taken from the Operator consent. For example:
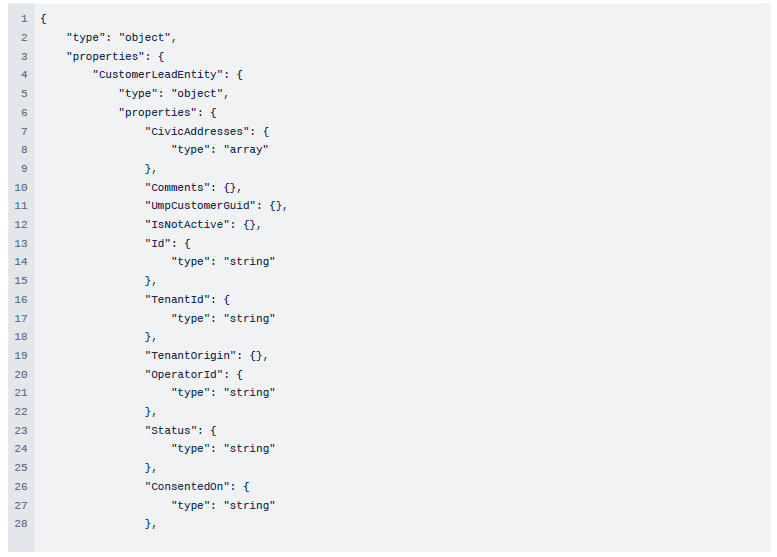
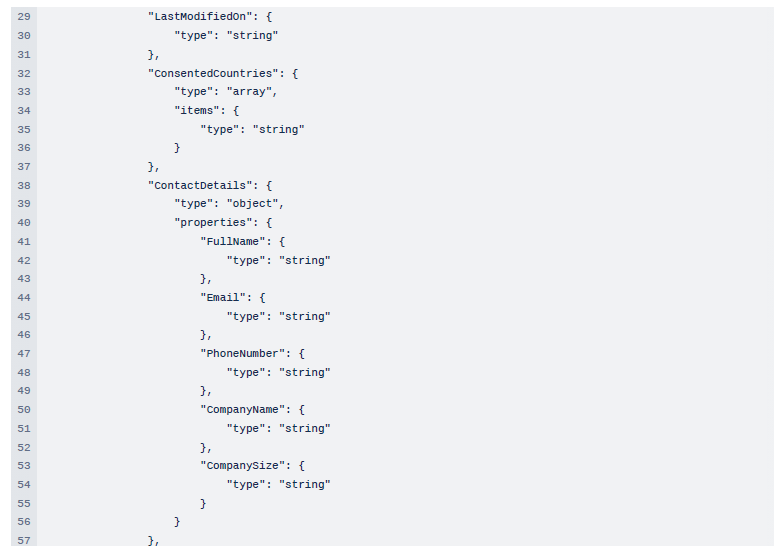
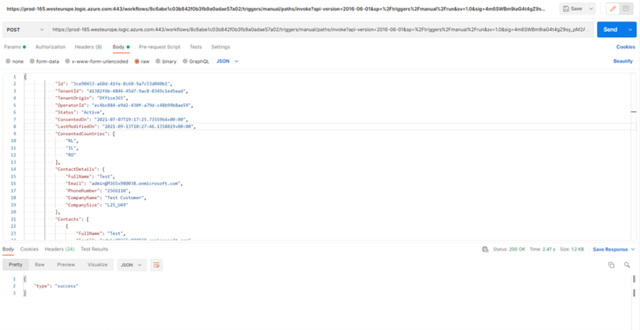
When a POST call is made using Postman, containing the consent Body. For example:
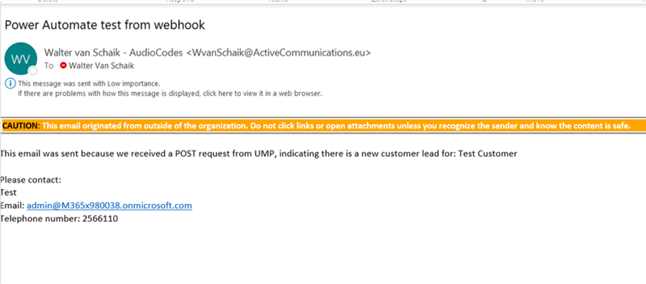
An email similar to the following is generated:
| ➢ | Do the following: |
| 1. | Open the Power Automate application. |
| 2. | Configure the query. |
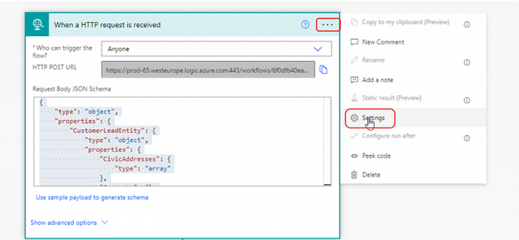
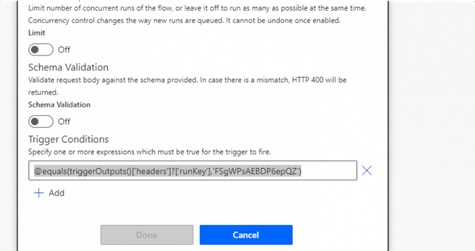
| 3. | To enhance security to your Post request, you an add a passcode; Edit your flow, click on the 3 dots, and select Settings. |
| 4. | Scroll down to Trigger Conditions and add the following string: |
@equals(triggerOutputs()['headers']?['runKey'],'FSgWPsAEBDP6epQZ') (change the passkey to your own value)
| 5. | In the Customer Leads page, click  |
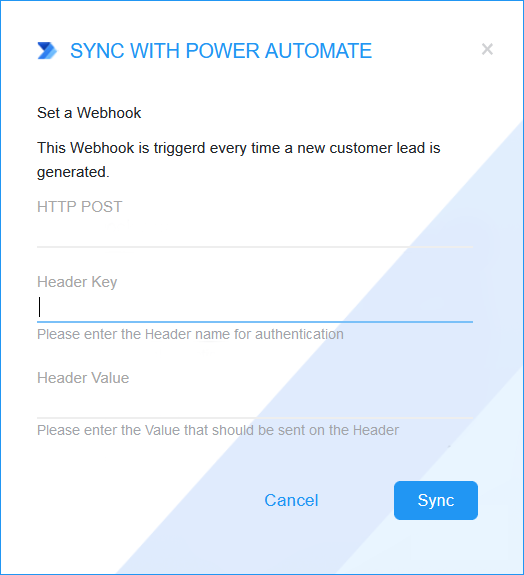
| 6. | Configure the following values: |
| ● | The destination URL for the HTTP POST from your Power Automate Flow. |
| ● | Enter the Header authentication key (header key: runkey) to connect to the destination address. |
| ● | The passkey in the Header Value |